This article describes how to use the SwiftUI Toggle. By the end of the article you will have learned how to embed Toggle in a child View and perform the Toggle’s action in a parent View.
Let’s start with the basics. Here is a variation of the example in the official documentation:
@State private var faceIdEnabled = false
var body: some View {
    Toggle(isOn: $faceIdEnabled) {
        Text("Face ID")
    }
}
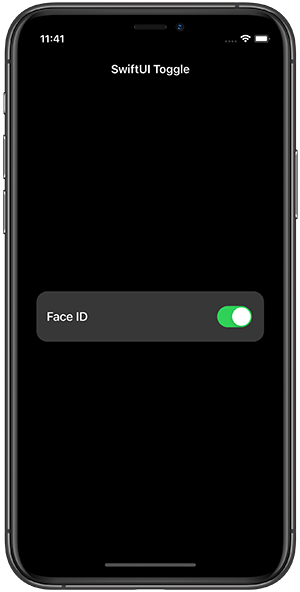
The above code will show a toggle control with “Face ID” for the title. By using a two-way binding on faceIdEnabled, we control if the toggle is on or off.
When the toggle is in the on state, we will want to run some logic. For example, if faceIdEnabled = true, then Face ID should be enabled. Add the onChange view modifier to the Toggle:
Toggle(isOn: $faceIdEnabled) {
    Text("Face ID")
}
.onChange(of: faceIdEnabled) { isEnabled in
    print("Face ID : \(faceIdEnabled)")
    // Perform logic to enable/disable Face ID/Biometrics
}
We often need to customize the appearance of the toggle with a different font, a background color, rounded corners, padding, etc. To help keep the code readable and maintainable, it makes sense to put the toggle and it’s styling into a separate View:
struct ToggleCell: View {

    var title: String
    @State private var isEnabled = false

    var body: some View {

        Toggle(isOn: $isEnabled) {

            Text(title)
                .font(.system(size: 18))
                .fontWeight(.medium)
                .frame(minHeight: 44)
                .padding(15)
                .foregroundColor(.primary)

        }
        .onChange(of: isEnabled) { isEnabled in
            print("Toggle : \(isEnabled)")
            // Perform logic to enable/disable Face ID/Biometrics
         }

    }
}
The ToggleCell could be added to a parent view, such as ContentView, like so:
struct ContentView: View {

    var body: some View {
        ToggleCell(title: "Face ID")
    }

}
So far, the toggle’s action (onChange) and state (isEnabled) are handled within ToggleCell. What if we want to perform the toggle’s action, and control the state of the toggle in ContentView instead? You may have complex logic, such as network API requests, where it makes sense to move the logic to the ToggleCell’s parent view.
Create a new ToggleState class that conforms to the ObservableObject protocol. This class will hold the on/off state of the toggle and help us control the state in a parent view.
class ToggleState: ObservableObject {
    @Published var isOn = false
}
The isOn property uses the @Published property wrapper to notify any observers when the value changes.
Next, we’ll make some changes to ToggleCell. Replace the definition of isEnabled with:
@ObservedObject var toggleState: ToggleState
And then update the Toggle in ToggleCell:
Toggle(isOn: $toggleState.isOn) {

    Text(title)
        .font(.system(size: 18))
        .fontWeight(.medium)
        .frame(minHeight: 44)
        .padding(15)
        .foregroundColor(.primary)

}
.onChange(of: toggleState.isOn) { isEnabled in
    print("Toggle : \(isEnabled)")
}
toggleState is marked as an ObservedObject. Whenever the value of toggleState changes, the view will invalidate and then refresh with the new value. It is important to note that toggleState is not instantiated in ToggleCell. The value for toggleState is past in via the ToggleCell initializer.
In this example, the parent view is ContentView. So the toggleState will be instantiated in ContentView, and then the value will be past to the ToggleCell. Add the following property to ContentView:
@StateObject private var faceIdToggleState = ToggleState()
And update the ToggleCell in the ContentView’s body:
ToggleCell(title: "Face ID", toggleState: faceIdToggleState)
By defining faceIdToggleState as a @StateObject, we are telling SwiftUI that we are creating an instance of an observable object. The ContentView has control over faceIdToggleState’s lifetime. This allows us to maintain a reference to the value of the on/off state, even if the ToggleView is deallocated.
Lastly, we want to perform the toggle’s action (onChange) within the ContentView. FIrst, add the following property to ToggleCell:
var onChangeHandler: ((Bool) -> Void)?
Then update the onChange view modifier for Toggle:
.onChange(of: toggleState.isOn) { isEnabled in
    onChangeHandler?(isEnabled)
}
And finally, add the onChangeHandler to the ToggleCell in ContentView:
ToggleCell(title: "Face ID", toggleState: faceIdToggleState) { isEnabled in
    print("Face ID : \(isEnabled)")
     // Perform logic to enable/disable Face ID/Biometrics
}
Thank you for reading. Please checkout the complete example on GitHub. If you have any questions or comments, please send me a tweet @robwh99.